Water rockets are a great activity to do with the family, your Scouting group, and in the classroom. They are fun to make and launch, and are also educational. I have taught Scout leaders how to incorporate simple rockets, including water rockets, in their Scouting program. See my PowWow Rockets Handout to learn more about these rockets. There is an Engineering professor at MIT that uses water rockets to examine the principles of thermodynamics.
Water rockets are perfect for younger children because they are relatively safe, are easy to build, and do not require permits to launch. Leave the solid fuel rockets to the older kids and parents. They also help the environment since the rockets can be made from recycled materials. A well constructed water rocket can go over 100 feet.
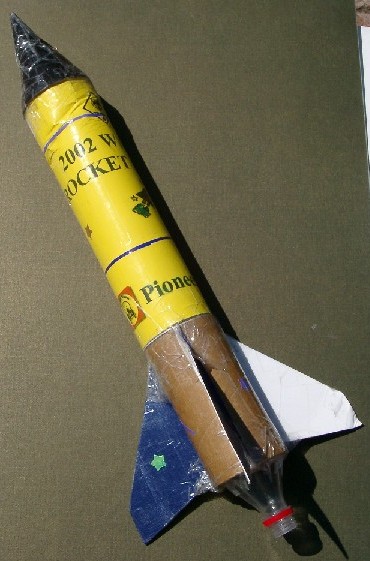
The Water Rocket Derby Rocket (using Mailing Tube)
The rocket that we use for our Water Rocket Derby consists of an 18" mailing tube, a 20 oz. soda bottle, fins and a nosecone. The rocket is constructed from the materials listed below. You will also need a roll of 2" wide clear packing tape. Color paper, stickers and markers can be used for decorating the rocket.
18" cardboard mailing tube (3" wide) with tube cap
Small quantities of mailing tubes can be purchased from the post office or mailing supply stores (Mailboxes Etc.). Bulk quantities can be ordered from packing supply companies on the internet such as Papermart.com . Cut the tube into a 12" section and 6" section.
Ask your local eating establishment or office building with a soda bottle vending machine if you can collect their empty soda bottles. For large quantities, try your recycling center.
Get these in a variety of bright colors for the nosecone.
Poster board
This is the thick cardboard used for framing pictures and photos. Some framing stores sell their scrap pieces for very low prices. Matte board is used for the fins.
Matte board
This can be purchased at craft supply stores, such as Michaels. The fun foam is cut into strips, and used to make a tight seal around the bottle when inserted into the tube.
Fun Foam
Rocket Construction
1. Insert the tube cap onto the end of the 6" tube, which has 3 marks for the fin guides.
2. Stack 12" tube onto capped end of short tube. Tape the tubes together.
3. Transfer nosecone pattern (from Rockets handout) onto poster board, and cut out nosecone. Shape the fan-shaped
cardboard into a nosecone and tape together, making sure that the opening fits onto the cardboard tube.
4. Center the nosecone onto the end of the 12" tube, and tape the nosecone onto the tube. Completely cover the
nosecone with tape - this will make the nosecone last longer over multiple lanuches.
5. Insert the plastic soda bottle into the 6" tube, with the opening sticking out.
6. Wrap the strip of fun foam around the top of the bottle, and shove it into the cardboard tube. The fun foam keeps
the bottle from moving around in the tube. Seal the bottle in tube with tape.
7. Transfer the fin pattern (from Rockets handout) onto the matte board, and cut out 3 fins.
8. Place each fin onto a fin guide on the 6" tube. Fin guides are 3 marks that are applied with a marker, equally
spaced around the tube. These marks are used for the fin placement. To mark the fin guides, cut a strip of paper
the circumference of the tube and fold the strip 2 times so that the folds divide the strip into thirds. With a marker,
mark the 2 folds, and the end of the strip. Wrap the strip around the tube, and place marks on the tube next to the
marks on the strip. The fin point should be pointing toward the nosecone. Tape fins SECURELY onto tube, and
cover completely with tape. The stiffer the fins, the straighter the rocket will fly.
9. Wrap the rocket body with 1-1/2 sheets of color paper, and tape onto the rocket. Tape the color paper to the tube
before wrapping around tube.
10. Attach Rocket ID Sticker below nosecone. Decorate rocket with markers, stickers, etc.
The Launch Pad
This will be the most expensive item for this activity. You can construct your own launcher, or purchase one ready-made. There are several web sites that have construction plans, and launch pads for purchase (see Links section below) - I personally use the Rocket Pop! launch pads. Most launch pads are constructed of PVC pipe. You can use a bicycle pump or an air compressor to pump up the rocket. The PowWow Rockets Handout describes two styles of launch pads you can try to make. For the rocket described above (used in the rocket derby), you will need a launch pad that is stable and capable of handling up to 100 pounds of air pressure. The simple pad described in the handout (1/2 soda bottle attached to 2"x4" board) is not stable enough to support this kind of rocket.
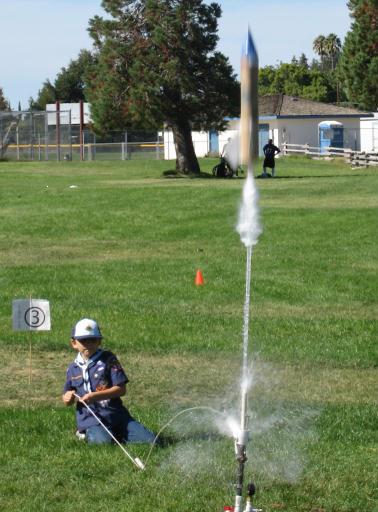
A water rocket derby is a great summertime Pack activity that a scout can do with the whole family. It requires less preparation and setup than the propeller driven space derby kits. A rocket derby uses water rockets that are propelled with water and air pressure. The rockets are simple enough to assemble that Tiger Cubs and siblings age 4 and older can also participate. The scouts and parents get a great thrill at seeing their rockets fly skyward. The rockets can fly up to 100-150 feet in the air. Solid fuel type rockets such as Estes rockets are beyond the capabilities of most Cub Scouts and are not recommended for a Cub Scout rocket derby.
Equipment & Supplies
20 oz. plastic soda bottle (empty)
Rocket Kits: Assemble the rocket kits from the materials listed above for the basic rocket. Cut the tubes, and the cardboard for the fins and nosecones ahead of time. Mark three fin guides evenly spaced around the short tube. Plastic newspaper bags make great sacks for storing all the pieces of the kit.
Safety Cones, Safety Tape: For marking the safety zone around the launch area.
Wind Sock or Flags: For determining direction and wind speed.
Large Water Tubs: For filling the rockets.
Bicycle Pump or Air Compressor: For a small den activity, a bicycle pump is sufficient. For a large Pack or district-wide event, an air compressor is recommended.
Launch Pads: For a large Pack event, you may want two or more launch pads. This speeds up the event, plus it is cool to launch multiple rockets simultaneously.
Stop Watches: For recording the flight times of the rockets.
Tips for Running a Rocket Derby
Prepare rocket kits in advance. Conduct workshop before event for assembling rockets, or build during a den or pack meeting. During the assembly, have on hand a supply of scissors, rolls of tape, and materials for decorating the rocket.
For competition, judge rockets for flight time (from lift-off to landing).
Get volunteers (parents) for: 1) Event Coordinator, 2) Time keeper (with stopwatch), 3) Water fillers (to fill rockets), 4) Launch crew (to operate the launch pads)
Compress rockets to a maximum of 85 psi for competition (vary pressure based on wind and enviroment).
Always follow safety precautions!
Rocket Derby Staff
To run a smooth rocket derby, you must have enough adults to staff the event. Ask some of the parents to help, especially those who are not already Pack leaders. Here are the minimum number of the staff positions:
Registration (1)
This person will check in the scout, assign him a number, and inspect the rocket.
This person will record the time aloft for each rocket with a stopwatch.
Time Keeper (1)
This person will assist each boy in filling the rockets with water (1/3 of the bottle is filled with water). Cut out the bottom of several empty bottles, and use as cups for transferring water to the rockets. Have on hand a bucket of water and extra 20 oz. bottles at the water station.
Water Filler (1)
Two people are required at the launch pad. One person to place the rocket on the pad, and the other person to pump the air. An air compressor is ideal but requires an electrical outlet. An air tank can be used, but may lose pressure with continued use. A bicycle pump requires a lot of pumping, but is a cheaper alternative. Use a pressure gauge (can be attached to the launch pad, air tank or bicycle pump) to keep a consistent level of pressure for each launch. An ideal pressure is 80 psi - adjust for site and wind conditions.
Launch Crew (2)
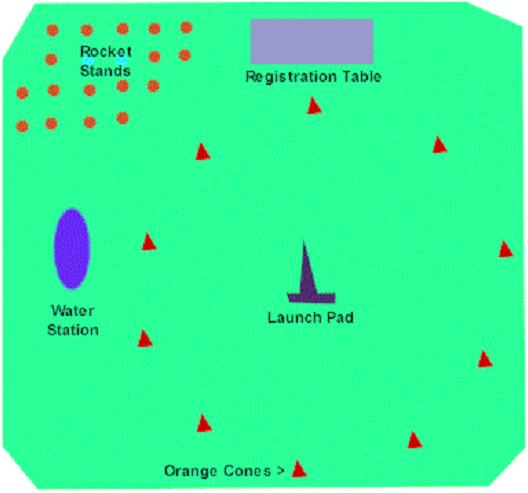
Rocket Derby Site Layout
A large open grassy field is an ideal location for the launch site. The site should be free obstructions such as trees, and cars. Place the launch pad in the center of the field, and mark off a 30-foot radius around the launch pad with safety cones or safety tape. Setup a staging area away from the launching area. Cut up 1/2" PVC pipe into 8" sections. Number these sections and stake them into the ground in the staging area. Stand each rocket on their matching numbered pipes in the staging area.
Water rockets are a relatively safe activity, but as with any outdoor activity, there is the potential for injuries. To ensure a safe event, follow these saftey tips:
Safety Tips
Compress rockets to a maximum of 85 psi for competition (vary pressure based on wind and enviroment).
Never use glass bottles for water rockets. Avoid using hot glue gun to attach the fins to the bottle. The heat from the hot glue may melt the bottle, and the bottle may rupture when the air is pumped into the bottle.
Never launch a rocket over 400ft without FAA clearance.
Never launch in a crowded area.
Choose an open field that is clear of obstructions such as trees, wires and cars.
Never stand directly over the launch pad while setting rocket on pad or during launch.
Only permit the students launching the rocket to retrieve it. Do not try to catch a falling rocket.
Mark out a safety zone, with safety cones or safety tape, of at least 40 feet around the launch pads. Adjust the safety zone as needed, based on shifting winds and flight patterns.
Rocket Derby Competition
The main goal of the rocket derby is the same as the pinewood derby: for the scout to spend quality time with his parents constructing and launching the rockets, and to have fun! Participation is much more important than the competition itself.
Plan event well in advance, set date and location (Park with large field).
Ribbons, medals or prizes can be awarded for construction (coolest looking, most unusual, tallest, shortest, most space-age), and for flight (highest, longest time aloft).
To measure height, several height gauges can be constructed and positioned at various spots away from the launch pad. An average height should be calculated to eliminate any bias from the readings.
To measure time aloft, time the rocket from the time it leaves the launch pad until the first part of the rocket touches the ground. If time permits, launch the rockets 2 times, and calculate the total time to determine the winner. This is the easiest method for competitions.
Have a separate division for siblings, in a Pack event. For a district event, siblings are not covered under BSA insurance.
Conducting the Launch
1. Find or assign volunteers for the derby staff positions: registration, timekeeper, water
filler, and 2 people for the launch crew. The registrar and timekeeper will stand at the
registration table. The water filler will stand by the water station, and the launch crew
will stand by the launch pad(s).
2. The registrar will enter the name of the participant on the scorecard, and assign a
number to each rocket. The number is written on the scorecard and the rocket. The
scorecard is given to the participant.
3. Call up the first group of participants. You can group them by den or by rank. The boys
in the group retrieve their rockets from the staging area and form a single line next to the
water station. The rockets are filled 1/3 with water.
Santa Clara County Council Water Rocket Derby
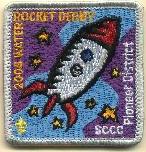
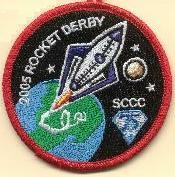
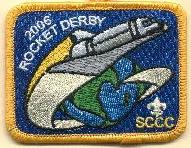
Our water rocket derby began as a district-level event in 2002, as a project for my Wood badge ticket. Prior to that, I had organized a couple of rocket derbies for my Pack, and taught some basic rocketry classes at Cub Scout Pow Wow. The council water rocket derby is one of the most popular events in the council, and is sold out each year. The 2006 rocket derby was featured in an article titled "Ready, Set, Launch!" in the Scouting Magazine Nov-Dec 2006 issue.
We use four launch pads in our derby, and can handle up to 150 scouts. We provide the rocket kits and the materials to build the rockets. See our 2007 Rocket Derby program for our event schedule and an illustrated construction guide.
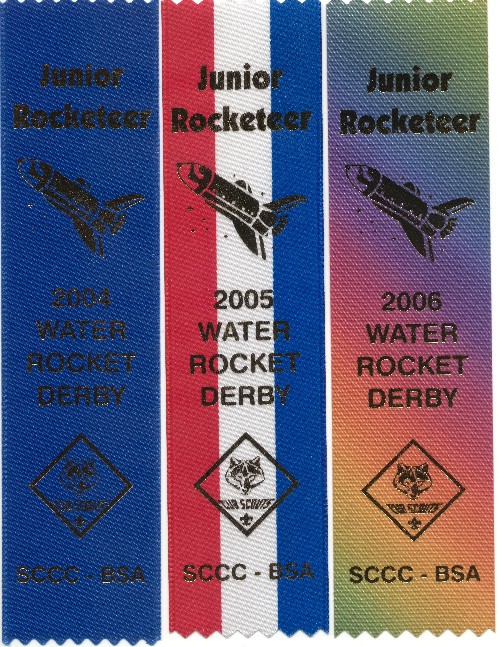
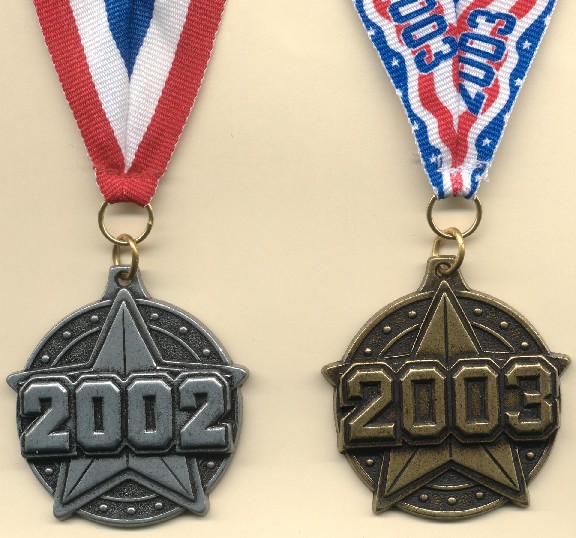
All scouts who attend our rocket derby receive a derby patch and a participation ribbon. The top 3 winners (rockets with longest flight times) from each rank also receive a medal. The derby patches are custom designed and are different each year. Your local Scout shop can order custom patches. I have also ordered custom patches from Stadri Emblems. The medals were purchased from Crown Awards, and the ribbons were custom ordered from H & R Trophies.
Contact Me:
4. The first boy in line takes his rocket to the launch pad, and hands his scorecard to the timekeeper. The launch crew
will place the rocket onto the pad, and air is pumped into the rocket. The participant stands at the end of the launch
rope. If the wind has shifted, adjust the launch pad so that the rocket lands away from the spectators.
5. Countdown from 3: 3-2-1-Blastoff! Pull on the launch pad rope to launch the rocket. If you are using multiple launch
pads, only one rocket is launched at a time.
6. The timekeeper records, on the scorecard, the elapsed time of the rocket leaving the pad until the first part of the rocket
hits the ground.
7. The participant retrieves his scorecard, and recovers his own rocket. He then proceeds to the back of the line by the
water station to prepare for the second launch.
8. After the second launch, hand the scorecard to the head timekeeper for the official tally. If time permits and you are
using multiple launchers, the third launch can be for fun (not timed), where multiple rockets are launched simultaneously.
9. Call up the next group of participants, and repeat steps 3-8.
Water Rocket Links
There are many websites devoted to water rockets, some simple ones and some very sophisticated ones. Some people are very serious about their rockets - the world's record height for a water rocket is over 2000 feet! Some sites sell launch pads, and some explore the science behind the rockets. Here are some of my favorite water rocket links:
Feel free to contact me, if you have any questions on water rockets, or how to run a water rocket derby.
Den & Pack Activities with Rockets
In addition to an organized Rocket Derby, water rockets can also be used in your den program to fulfill Wolf, Bear and Webelos badge requirements, or as a fun Pack Spring or Summertime activity. They are also great for recruitment!
Den Activities:
Wolf Elective 5g: Make a model rocket
Bear Achieveient 21f: Make a model of a rocket
Bear Elective 1d: Build a model of a rocket or space satellite
Webelos Scientist 5: Show the effects of air pressure
Webelos Scientist 6: Show the effects of watr & air pressure
Webelos Scientist 7: Build and launch a model rocket
Additional Activities:
- Rockets can be used to teach the scientific method. Experiment with different amounts of water and chart the launch
times verses water level, to determine the optimum water level. Experiment with different fin designs and see which
ones give the best flight.
- Foster creativity and exploration (for older boys). Give materials to the boys without any directions, and have them put
together a rocket they think will fly the highest. Explore options for recovery systems such as parachutes.
- Attach glow sticks to your rockets for some cool night launches. Get the thin kind that are used for glow bracelets.
- To make your rocket spin during the flight up, attach all the fins at the same angle slightly off vertical.
I have a few extra rocket derby patches, for any interested scouters.
Paper Wrapped Rockets
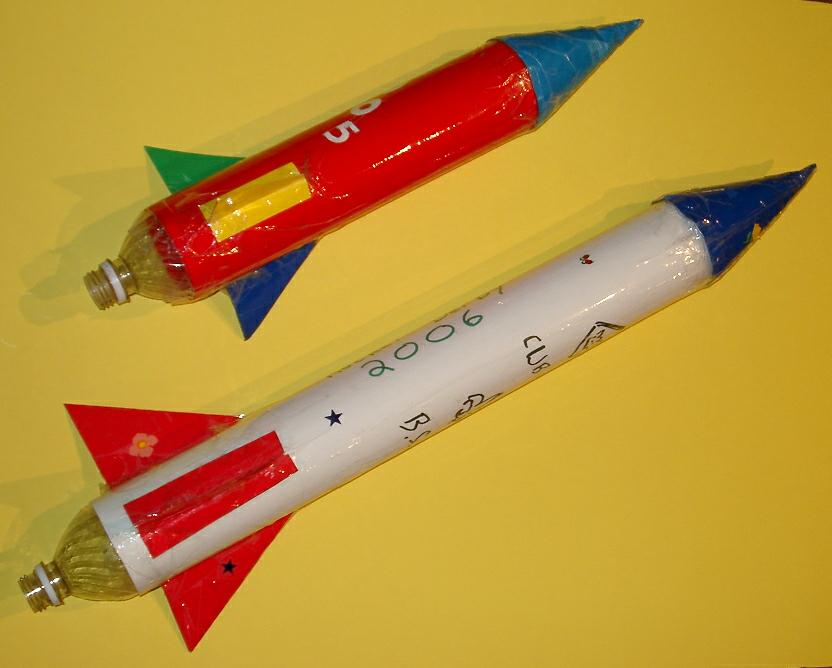
The two rockets on the left were made by wrapping heavy paper around two 20-ounce soda bottles. The red one is 19" long. Two 20-ounce bottles are placed end-to-end and taped together. Then a 12"x10" sheet of colored poster board is wrapped around and taped to the bottles. The 3" fin pattern from the handout is used for this rocket.
The white one is 28" long. A 26"x20" sheet of heavy-stock paper (at least 80-lb stock) is wrapped around the two 20-ounce bottles that are taped to one side of the sheet and rolled, so that about 2-1/2" of each bottle extends beyond each edge of the sheet. The 4-1/2" fin pattern from the handout is used for this rocket. If you make this rocket longer, it will actually float down (good science project to determine optimal length).
The longer rocket (white one), may require two people to assemble (a Cub Scout and his buddy or adult partner). Since it is longer than the red rocket, it will be more stable and fly straighter than the red one. The red rocket will flip in flight, but is simpler to make.and looks just as cool. Click on image of rockets to see enlarged view.
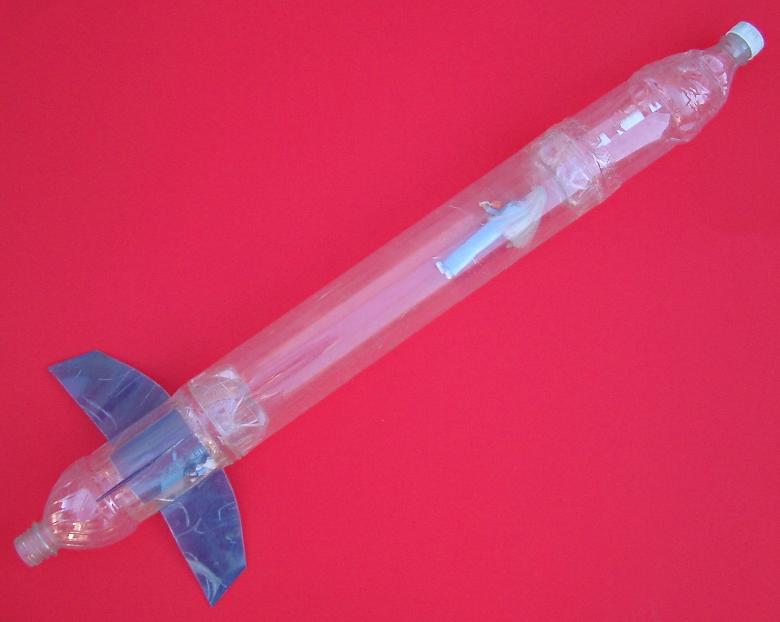
All Plastic Rocket (Barbie Rocket)
The rocket on the right is made by taping two 20-ounce bottles to the ends of a plastic mailing tube. The fins are cut from a sheet of heavy plastic mylar. I was able to find some recycled plastic sheets that I cut out and doubled over for the fins. The top bottle is the nosecone.and is sealed with a bottle cap. You can place an object (payload) in the top bottle, or in the mailing tube before it is taped to the bottles. You will notce that this rocket has a passenger (a small Barbie doll from a McDonalds happy meal).
This rocket appeals to the girls and the Moms, as well as the boys. The boys think that Barbie will blow up. Barbie has survived over 50 flights! Because the rocket is all plastic, it is very light, and flies very high. It also lands harder than the all paper rockets, so you will need a larger and softer landing area. When the nosecone becomes too mangled, it is replaced with a new bottle. This is the second generation of the Barbie Rocket.
Pack Activities:
- Space Theme
- Space Derby or Rocket Derby
- Pack Picnic or barbecue
- Scout-O-Ramas
- Camporees, Webelos-ree
- Summer Day Camp / Family Camp
- Cub Scout Roundup or Recruitment
Types & Sizes of Bottles
You have probably noticed that I have only mentioned 20-ounce soda bottles for my rockets. Can other types of bottles, and other sizes (such as 16-oz) be used? That depends... Plastic bottles come in many varieties: water bottles, soda bottles, juice bottles, etc. Soda bottles make the best water rockets, because they all have fairly uniform openings (to fit standard screw caps), and are rated to withstand high pressures (carbonation process). The openings of the soda bottle fit nicely onto the launch tube of the launch pad. Water bottles made by water companies (Crystal Geyser, Alhambra) will work, but they are not rated as high as soda bottles. These water bottles have a shorter cap depth and narrower rim. Some water bottles (Aquafina) are actually made by soda bottlers - these are OK. Stay away from juice bottles with the wide mouth (Sunny Delight), because these are too wide for the launch tube. So what brand of soda bottle works best? I try to collect as many bottles as I can, and test the openings with my launch tube after rinsing out the bottles. There is enough variation in the openings that some bottle may not slide onto the launch tube. I have found that the Pepsi and Aquafina bottles tended to fit the best.
Rocket Derby Photos
(requires Java run-time engine)
Bottles come in a variety of sizes, from very small (8-oz) to jumbo (5-gallon). What size bottle you use depends on your launch system, and how you plan to use it. I prefer the 20-oz bottles becase that is the most common type of soda bottle to collect from recycling areas, and they fit the best inside the 3" mailing tubes. They are the ideal size for the Cub Scouts and the rocket derby. For the paper wrapped rockets described above, bottles other than 20-oz size (such as 16-oz, 25-oz, 0.5 liter, 1-liter) will work, but you may need to adjust your launch pad to fit the opening. 2-liter bottles make nice bottle rockets, but they should be saved for the older boys, because they require more air to pressurize (can be tiring with a bicycle pump). What about the 5-gallon bottle? That's way beyond my league - Only for the diehard water rocket fanatic (see the Big Bertha).
Launch Control Table
If you plan to run a water rocket derby using multiple launch pads, we recommend building a launch control table.The launch table is invaluable for handling a large event such as a Pack or district derby. The launch table connects an air compressor to multiple launch pads through a manifold and regulator system that controls the air flow to the individual pads. It can be built from off-the-shelf parts that are available from most hardware and home-improvement stores. See the Launch Table Plans for a diagram and details of our launch table. You will also need to supply your own table to mount it on. After assembling the table, connect the air hoses from the table to each of the launch pads, and to the compressor.
Page last Updated: 1/5/2009
Are you a Facebook member? You can contact me through Facebook if you like.